
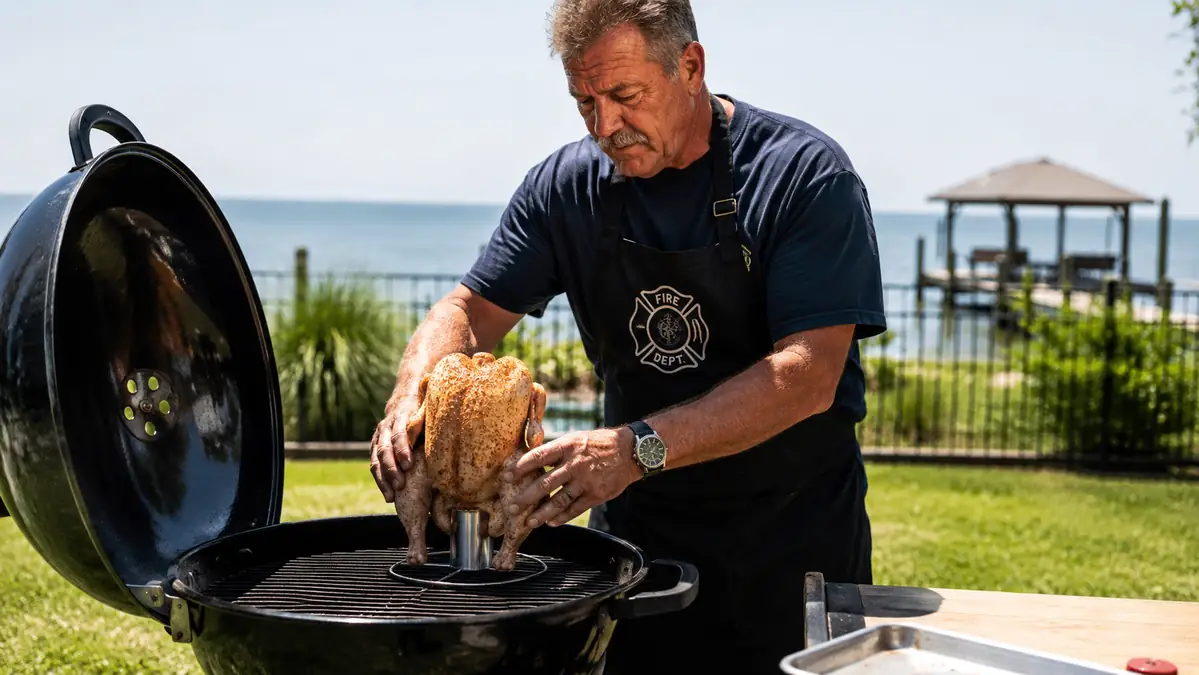
My first attempt at a whole chicken on the grill looked good enough to photograph and bad enough to send Danny to the freezer for a backup box of nuggets. Charred skin, pink meat down by the thigh bone, and a flare-up underneath it that had smoke rolling out past the lid like something out of a call sheet. Twenty years at the firehouse and I still nearly turned dinner into a loss report. The problem wasn't the grill and it wasn't the chicken. It was that I had no idea how to get even heat moving around a whole bird without babysitting it the entire time, lifting the lid every five minutes like that was going to fix anything.
What actually fixed it for me was switching to vertical roasting on a Koohere stainless steel beer can chicken holder. Once the bird stands upright instead of lying flat on the grate, heat and smoke move around it evenly on every side, front, back, and both wings, and you stop guessing at whether the underside is cooking at a different rate than the top. I've walked Frank next door and my son-in-law Mark through this exact method more than once now, and it works the same way every time on my kettle, on Mark's gas grill, and on Big Earl's offset smoker. Here's the five-step process I use, start to finish, no guesswork required.
A wobbly setup is how you end up with a burnt bird.
The Koohere stainless steel holder gives your chicken a wide, steady base so you can focus on heat and timing instead of babysitting a tipping rig.
Amazon Check Today's Price on Amazon →Step 1: Dry Brine the Night Before
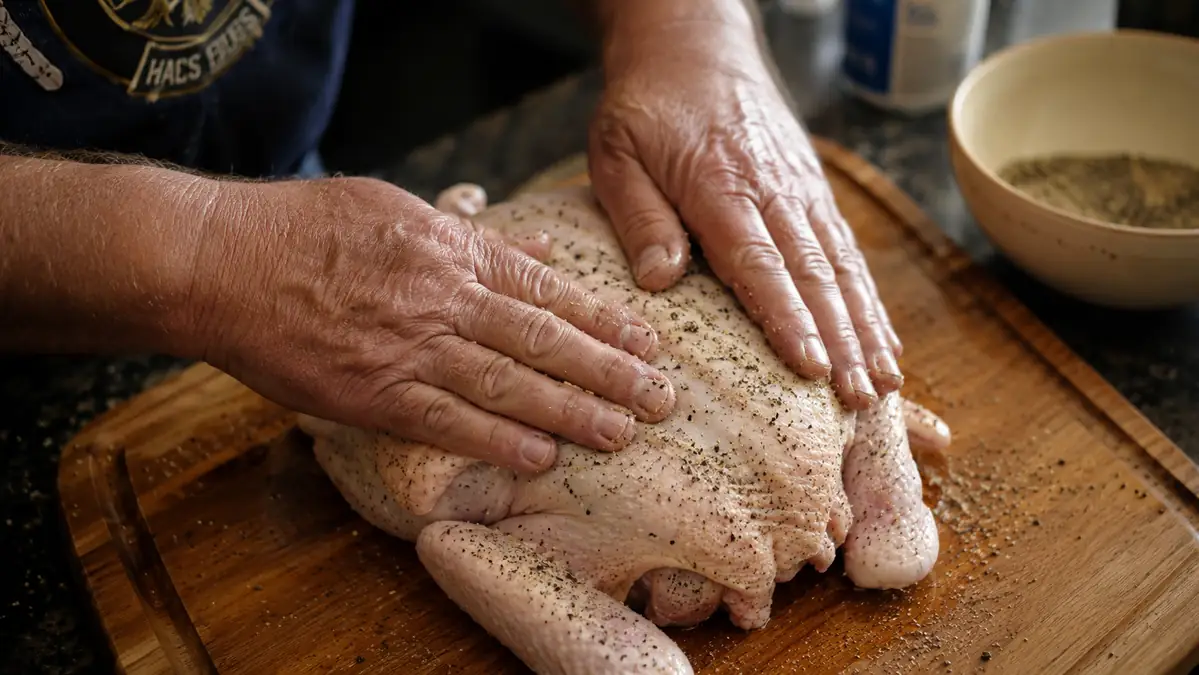
I season a whole chicken at least eight hours before it goes anywhere near the grill, overnight in the fridge if I can plan that far ahead. Pat the bird fully dry with paper towels first, inside and out, because wet skin never crisps up right no matter how hot your grill runs or how long you leave it on. Then salt it heavy, about a tablespoon of kosher salt for a five to six pound bird, worked into the skin and under it wherever your fingers can get in without tearing it loose from the meat.
After the salt, I go with black pepper, garlic powder, smoked paprika, and a little dried thyme, nothing fancy, just enough to build a crust once the skin starts rendering out on the grill. Leave the chicken uncovered on a rack in the fridge overnight, not sitting in a bag or wrapped in plastic. That dry, open exposure pulls moisture out of the skin so it crisps instead of steaming once it hits the heat. Donna used to think I was drying the chicken out on purpose and ruining a perfectly good bird. She stopped saying that around the third time everyone cleaned their plates and asked when I was making it again.
Pull the bird out of the fridge about 45 minutes before you plan to cook so it isn't ice cold going onto the grill. A cold center means the outside finishes long before the inside catches up, which is exactly the charred-outside, raw-inside problem I started with, and it's an easy mistake to make when you're rushing to get the fire going and forget the chicken is still sitting cold in the back of the fridge.
Step 2: Set Up Indirect Heat
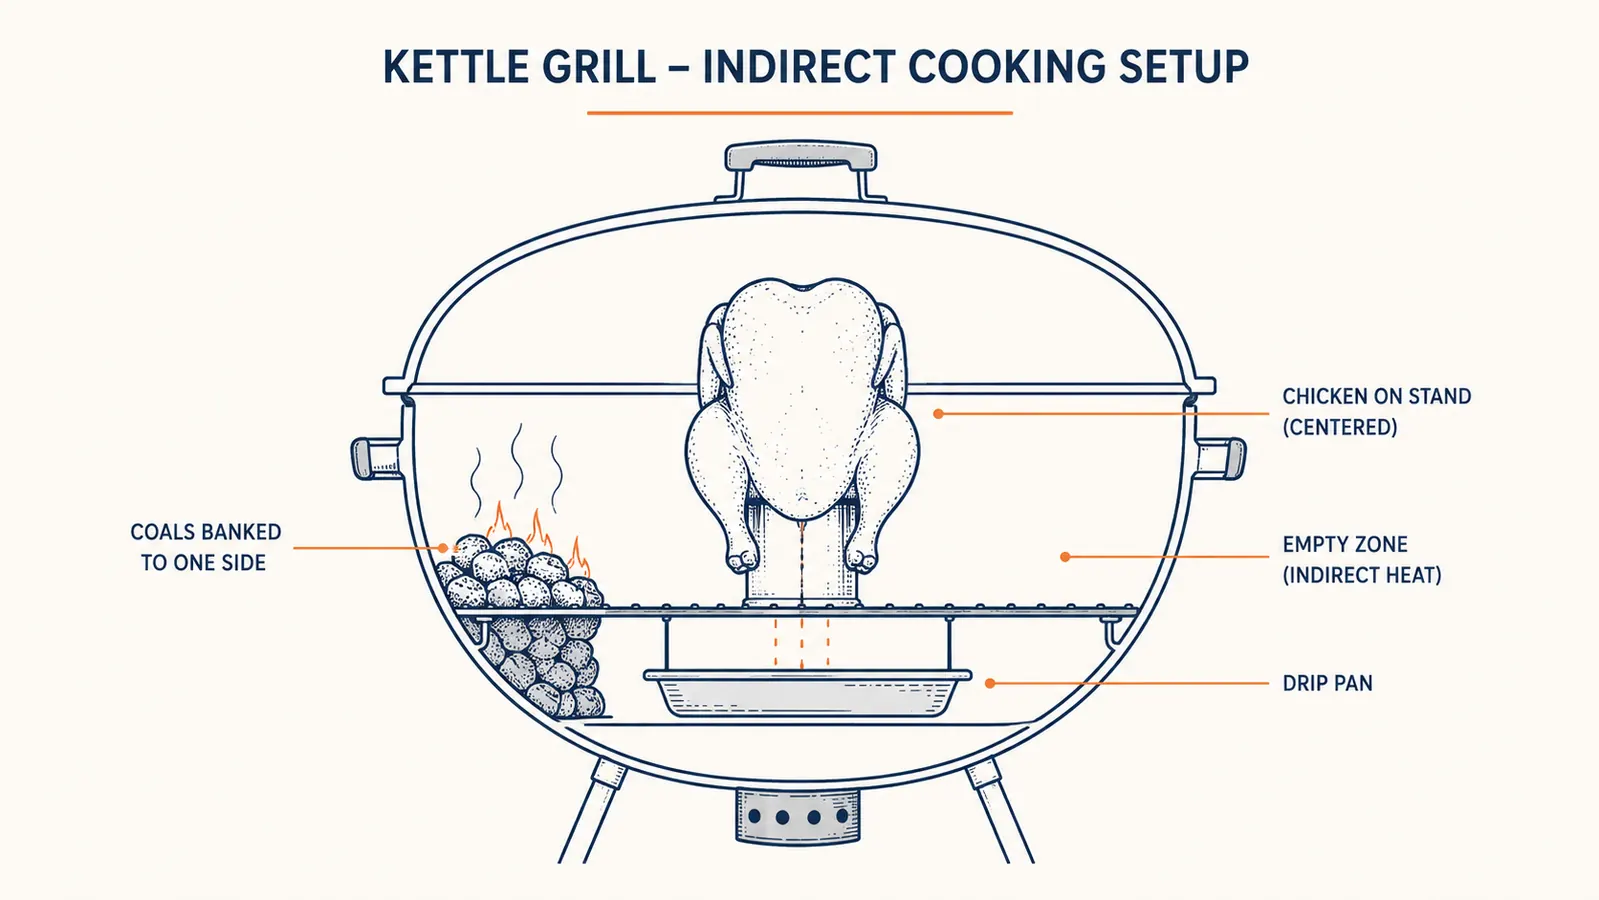
A whole chicken standing upright needs indirect heat, not direct flame sitting right underneath it. On a charcoal kettle, I bank all my lit coals to one side of the grill and leave the other side completely empty, then set a small drip pan in that empty zone to catch grease and keep flare-ups from licking up the sides of the bird as the fat renders out over the next hour and a half. On a gas grill, I light the burners on one side only and leave the other side off entirely, running the chicken over the unlit burners for the whole cook, never over an open flame.
Target grate temperature is 350 to 375 degrees. Any hotter and the skin can scorch before the meat catches up, any cooler and you're looking at a longer cook that dries the breast out waiting on the thigh to finish. I keep a grate thermometer clipped near where the chicken actually sits, not the built-in dome gauge, because those read the air up near the lid and can be off by 30 or 40 degrees from what's really happening down at grate level where the bird is cooking.
This is the step guys skip when they're in a hurry to eat, and it's the one that causes the most trouble down the line. Big Earl always says the fire is doing half the cooking and you're just managing it, and twenty years of watching him run a grill has taught me he's not wrong about much when it comes to fire. Get the heat split right before the bird ever touches the grate, check your vents, and the rest of the cook mostly takes care of itself from there.
Step 3: Load and Seat the Chicken on the Holder
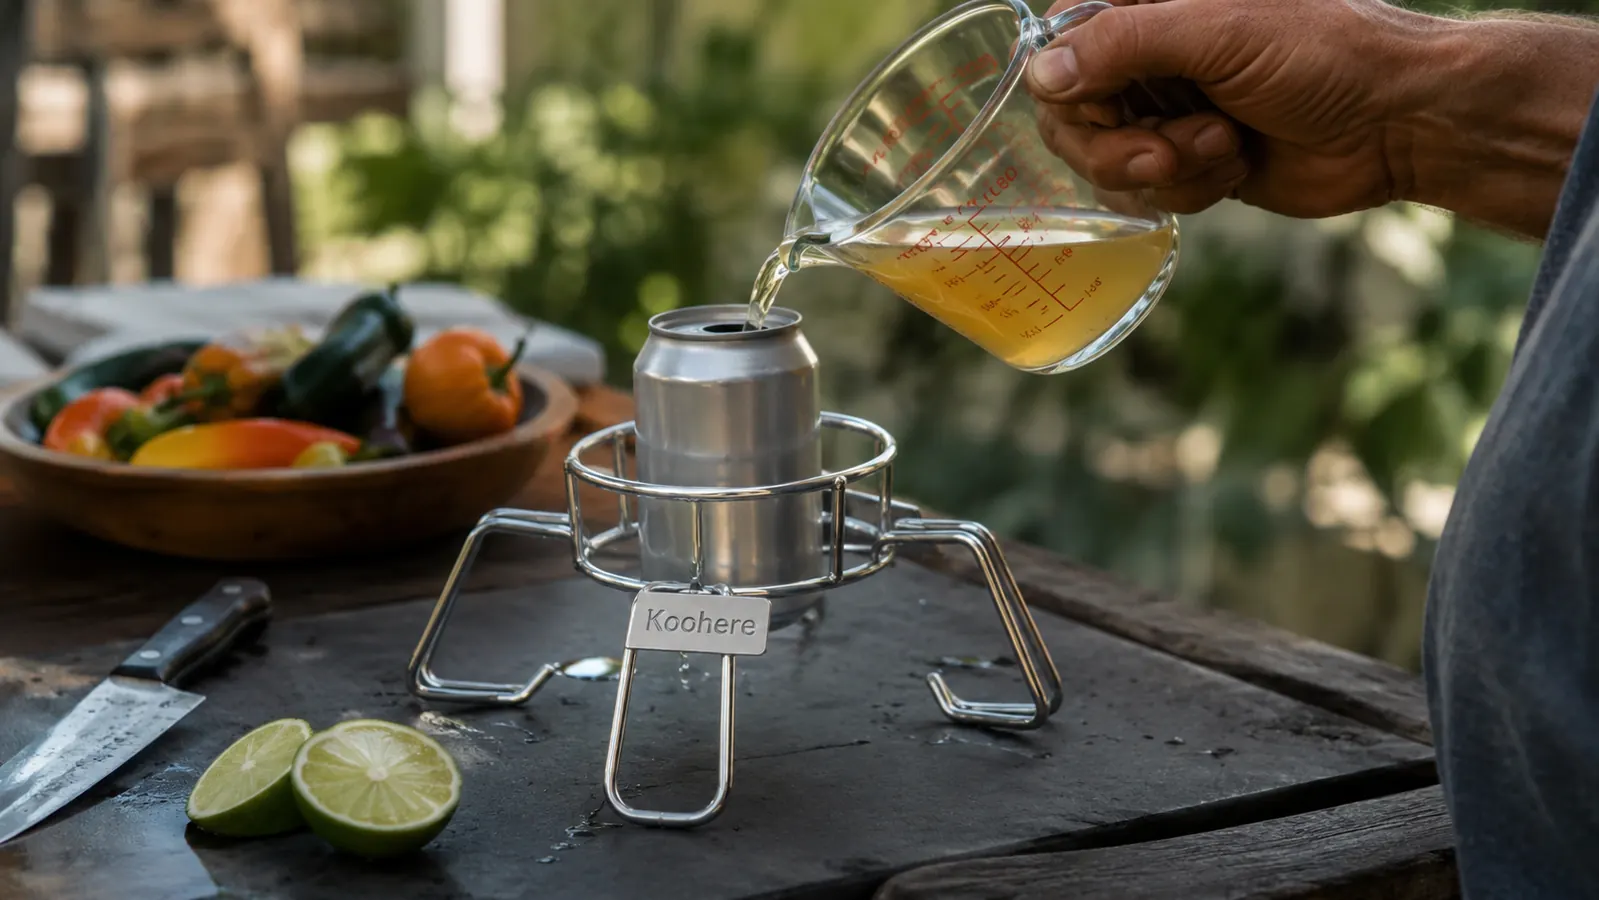
This is where the Koohere holder earns its keep. Fill the center liquid chamber with about a cup and a half of liquid, I run apple cider most of the time, sometimes chicken broth with a splash of vinegar, occasionally a light beer if that's what's cold in the fridge and nobody's claimed it yet. The liquid steams gently from the inside as the chicken cooks, which helps keep the breast meat from drying out while the outside is roasting and browning in the open air around it.
Lower the chicken down onto the holder cavity-first so it sits centered and level on the wide stainless base. This is the exact spot where a beer can used to give me trouble, a narrow can under a heavy bird is a top-heavy setup waiting for one gust of wind or one bump of the grate to go over, and I lost a whole dinner to the coals that way once, warm beer and all. The Koohere stand has a flared base built specifically for this job, so the bird sits stable even as you carry the whole rig from the kitchen counter out to the grill without a hand under it the entire walk.
Tuck the wing tips behind the back so they don't burn off before the rest of the bird is done, and give the legs a light truss with kitchen twine if you have it handy, just enough to keep them from splaying out and cooking faster than the breast does. Then carry the whole thing out using the built-in handle on the Koohere holder. That handle matters more than people expect walking in, because after an hour and a half at 350 degrees you do not want to be reaching bare-handed around a hot metal frame to move a finished bird onto a platter.
Step 4: Roast to Temperature, Not to the Clock
Set the loaded holder in the center of the indirect zone, close the lid, and leave it alone. I check the fire and the vents around the 30-minute mark and again at 45, but I am not lifting that lid every ten minutes to peek at it, because every time the lid comes off you lose heat and you're adding time back onto the cook that you don't need to add. A five to six pound chicken usually runs 75 to 90 minutes at 350 to 375 degrees, but time on a clock is only ever a guideline, never the real answer.
What actually tells you the bird is done is a meat thermometer in the thickest part of the thigh, not touching bone, reading 165 degrees. I check the thigh and the thickest part of the breast both, because that's where uneven cooks show up first if something in your heat setup was off. If you're getting steady thin smoke and consistent heat, the open frame on the Koohere stand lets that smoke and hot air circulate around the bird on every side instead of pooling against one flat surface the way it does with a can, which is a big part of why the skin comes out even instead of pale and soft on one side.
If the skin is browning too fast before the internal temp catches up, which happens more often on gas grills running a little hotter than you think, tent a loose piece of foil over the top of the bird for the last 20 minutes of the cook. That slows the outside down a little without stopping the inside from finishing at the pace it needs to.
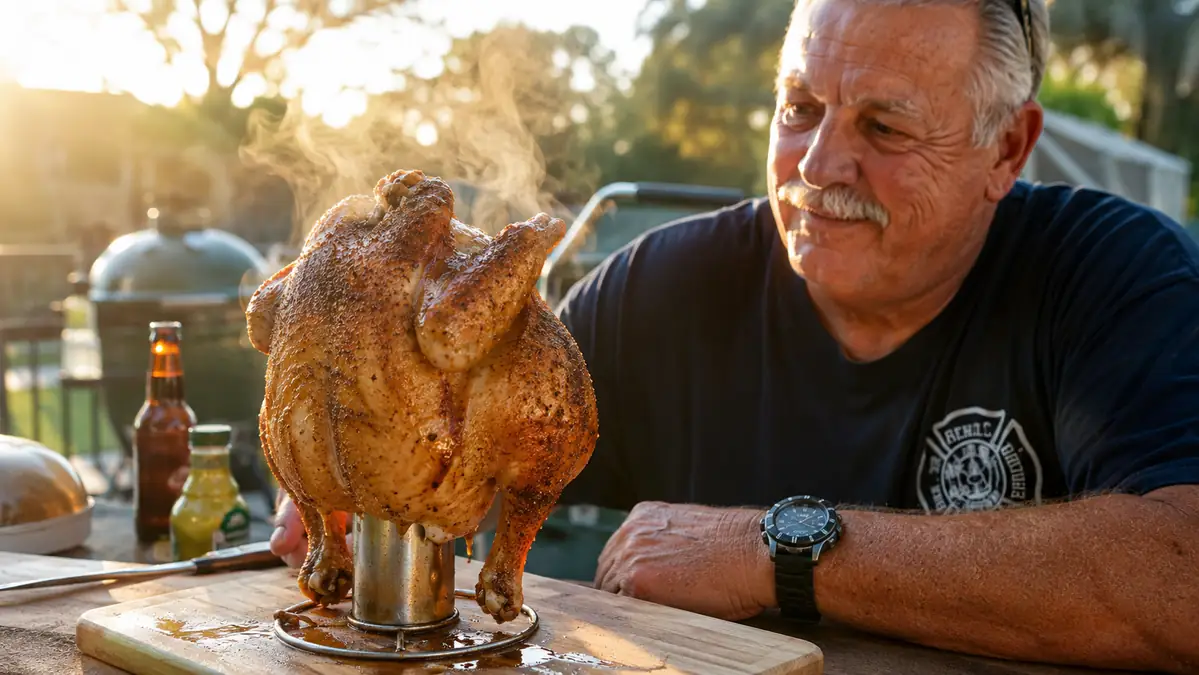
Step 5: Rest, Then Carve
Once the thigh hits 165, use the handle to lift the whole holder, chicken and all, straight off the grate and onto a cutting board. Let it rest a full 15 minutes before you touch a knife to it. I know that's the hardest step for anybody standing around hungry and smelling that bird the whole time, but cutting into it early lets all the juice you just spent 90 minutes protecting run straight out onto the board instead of staying locked in the meat where it belongs.
The chicken stays upright and stable on the stand through the whole rest, which means you can carry it straight to the table looking like something worth taking a picture of instead of transferring it to a platter first and losing half the presentation in the move. Carve it the way you'd carve any roasted bird, legs and thighs off first, then the breast in clean slices down each side of the keel bone. My grandsons Eli and Wyatt fight over the drumsticks every single time we do this, so I've learned to pull those off and set them aside before anybody else gets a vote in the matter.
What Else Helps
A couple of small things make this easier once you've run it a few times. Keep a spray bottle of water nearby for the rare flare-up on the indirect side, it happens far less often once the bird is elevated and centered instead of sitting flat and dripping straight down onto hot coals, but it's still good insurance to have on hand. And write down your liquid, your seasoning mix, and your total cook time the first couple of runs. I didn't do that early on and kept relearning the same lessons every few months instead of building on what already worked. Once you've got your numbers dialed in on your specific grill, a whole chicken on the Koohere holder turns into one of the easier things you cook all summer, not one of the scarier ones you keep putting off for another week.
The bird that tipped into my coals taught me more about grilling than every chicken I got right after it.
A steady base beats a steady hand every time.
The Koohere stainless steel beer can chicken holder is the one piece of gear that took the guesswork and the wobble out of roasting a whole chicken on my grill.
Amazon Check Today's Price on Amazon →